 Pictured at left are (l-r) Adam, Linus, Mara & Spencer, and Sully (Linus' dog). We are smiling because we just finished erecting the first stage of our HayGrove hoophouse - you can see the posts behind us in the picture. We spent yesterday and today drilling the posts for the 3 bays (4 rows of posts). It took us 3 hours each day to do the drilling of the posts, we placed 86 posts each day. Each row took us about 1.5 hours, and then at the end of today, Spencer and I drilled in the anchor posts, which took us about 40 minutes each side, so another hour and 20 minutes for that job. All told, I'd say this phase of the project took us 10 hours to accomplish with 4 people (though three could do it you had to). I only have pictures from yesterday, as the camera fell off of the tractor today and lost all of today's photos! Sorry, Josh - thanks for taking all of our pictures today, though! We appreciate your help driving the tractor today, too! This will necessitate some more picture taking soon so that you can see the full extent of the project. So, on to some pictures!
So. As you'll recall, this whole project was held up for a year while FEMA, VT Dept. of Agriculture, the City of Burlington, the Department of Historic Preservation (DHP) and others worked to try and figure out if a 1/2 acre hoophouse was in violation of anything. FEMA decided that our hoophouse, which was custom built for one field had to be re-oriented to coincide with the direction of the Winooski river, so in the event of a major flood the water would flow in one end and out the other, causing minimal damage to others downstream. Illogical or not, we have to comply, so one other piece to the puzzle was that DHP wanted to do an archaeological dig since the arbitrary OK digging depth in their eyes was 18", and our posts were going to be sunk 30". Also, the Intervale is considered a site of "archaeological significance", so documenting interesting artifacts is in their interest. So, once the site was dug and catalogued, we'd get the OK. That happened, as you can see here, last week. This is the UVM archaeology crew that came to survey the site - 20 holes dug to 90 cm (about a meter), offset to where our posts would actually be going.
 They dig a pit, toss soil into a screen, shake the screen, look for artifacts, then do it until they've reached the depth they are shooting for.
 Here John Crock, the lead of the dig shows us where there are old plow lines, also lines that indicate past flood events. It was quite fascinating!

Here you can see the flags running all the way down the 300' length of the hoophouse. What did they find? Nothing. Not a single thing. Not even an old horseshoe or nail! Sooooooo.

We start building!!! Here Spencer is pounding in our first stake to set the perimeter of our house.

Here we attempt to measure the distance. It was very windy and cold on this day. NOT FUN! Also hard to really measure accurately with all the wind flapping the measuring tape around.

Ah! Perfectly square and ready to go!

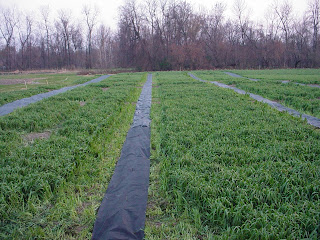
This field belonged to Full Moon Farm this season, and before they left, they seeded a nice thick cover crop of oats. Thanks, Dave! I mowed swatches of it down to make the laying of Lumite down much easier.
 Here's our beloved Lumite the Landscape Fabric. This is laid before drilling the posts because once the hoophouse is all constructed, we never want to have to weed around each post!
 Once all the Lumite is in place, we start marking where each post will go. We created a plumb bob from a bunch of landscape tacks, and marked each post spot with a bent landscape tack.

Here I am measuring the required 7'3" between each post.

Once they are all laid out, we cut a slit at each tack to make way for drilling in the post.
 OK! All marked out and ready for action! We finished this project just as the sun was going down at 4:30 pm!!! Ah the north.....
 Next day, I loaded up the tractor and wagon with the posts while Spencer went to pick up the 2 man auger that we need to use to drill it in. It turned out that we needed to modify the bit that was sent to us to make the drilling possible, and so we had to take it to a metal shop and ask them to essentially rebuild it so that we could do the job. And, becuase they had the right tools, they accomplished this in all of 20 minutes, and then we were in business. Of course, the running around to see who could do this for us gobbled up 2 hours! So, instead of starting at 10 am, we finally really got going at 1pm.

This was our setup: tractor to pull us, wagon to hold all the posts, picnic table on the back of the wagon to hold us up high enough to get the auger on top of the poles! Felt unsafe at first, but it worked REALLY well.

Here's Adam - the post leveler and stabilizer.
 Here's the beast! It weighs about 40 or 50 pounds! We had to get a PTO extension (the red piece), and that shiny piece on the bottom is the "bit" we got made and used to connect the auger to the post.
 Linus drove the tractor forward most of the day. This was a HUGE help - so we didn't have to jump down, move the tractor, then jump up, drill, jump down, etc. Glad we didn't skimp on help!
 I would watch for our post markers to appear under me as Linus drove forward, then I'd yell, "Stop!". Sometimes I'd yell, "Back!", sometimes I'd yell, "Forward a little!" Our vocabulary was reduced to these words and when Spencer and I would drill, we'd use words like, "Ready!", "OK!", "Good!" Felt very cavemanlike, but it was so important to be clear - we're dealing with a big, heavy, unpredictable machine, here, people! Be clear.

Here is what a complete row looks like! Notice the undulations with the landscape. This is what HayGroves do - conform to the natural undulations of fields. I think it will look like a caterpillar when its got its plastic on!
Here's a video that Spencer tried to take of what the process was like.
More pictures to come soon!


